How To Adjust Roof Overhang In Revit

Roof Overhang Problem Autodesk Community Revit Products

Revitcity Com Roof Overhang Extension
Revit 2014 Roof Eaves And External Wall Youtube

Solved Roof Level Overhang Autodesk Community Revit Products

Solved Roof Overhang Option Not Available For Some Roofs Autodesk Community Revit Products

Revit Roof Tip 5 Activate Overhang On Picked Walls Roof Youtube
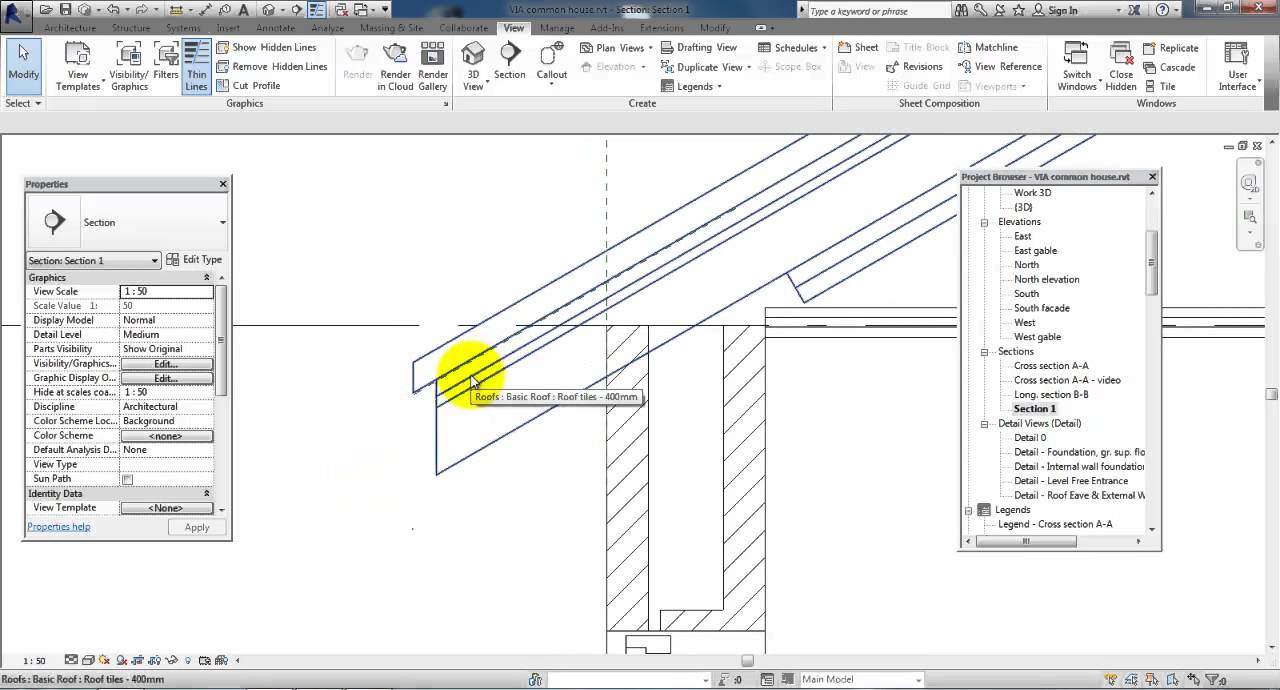
Double click the roof or select the roof and click modify roofs tab mode panel edit footprint.
How to adjust roof overhang in revit.

Revit Roof Edits Increasing The Overhang Youtube
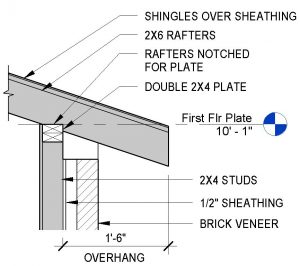
Overhangs And Wall Thicknesses In Revit Best Cad Tips

Modify A Roof Revit Lt 2017 Autodesk Knowledge Network

Trim Interscting Roofs Autodesk Community Revit Products

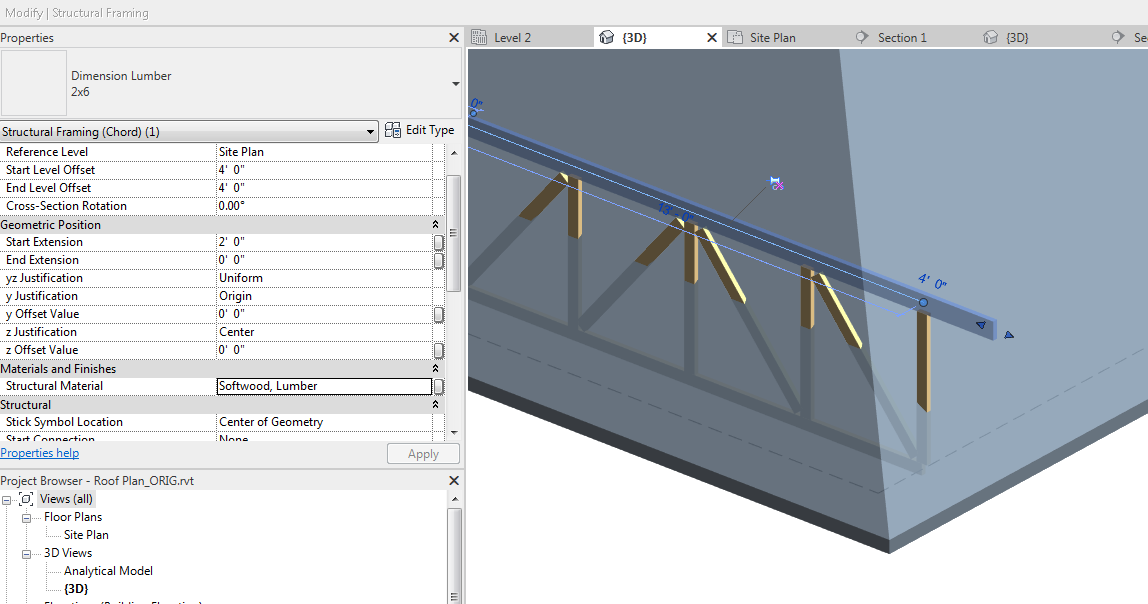
Revit Adjusting The Top Chord Of A Truss For An Overhang Youtube

Eaves Revit Products 2019 Autodesk Knowledge Network
How To Attach A Howe Truss With Overhang To A Roof In Revit Revit Products 2018 Autodesk Knowledge Network

How To Troubleshoot Roof Overhang And Offset Issues In Autodesk Revit Youtube

Creating An Overhang Youtube

How To Adjust Roof Eave Edges Youtube

Prefab Roof Truss Overhang Issue Autodesk Community Revit Products
Https Portal Imaginit Com Portals 0 Whitepapers Imaginit New Wp Revitroofs Pdf

Revit Roofs 8020 Bim

Revit Roof Edits Increasing The Overhang Revit Architecture Autodesk Revit Roof

Roof Overhang Autodesk Community Revit Products

Revit Lesson 6 Jeanomar Scully 214 095 933 Src221

Solved Why Can T I Make This Roof Autodesk Community Revit Products

Solved Joining Roof Autodesk Community Revit Products

Solved Roof Overhang Overlap Single Sketch Autodesk Community

Create Roof Trusses With Purlins In Revit Roof Trusses Roof Truss Design Roof
How To Show A Roof Overhang In A Plan View With Revit Imaginit Building Solutions Blog
Video Create A Roof Revit Products 2020 Autodesk Knowledge Network
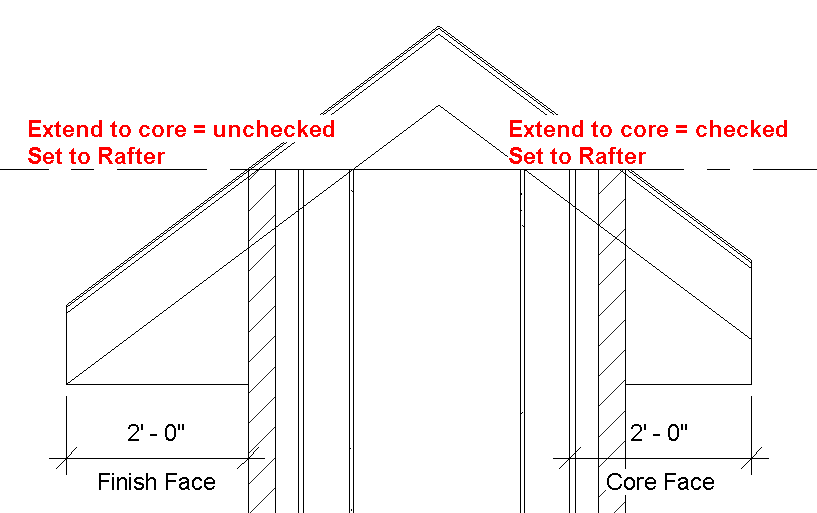
Roof Overhang Values Bd Mackey Consulting The Revit Geek Blog

Create A Roof By Footprint Revit Products 2016 Autodesk Knowledge Network
Source : pinterest.com
